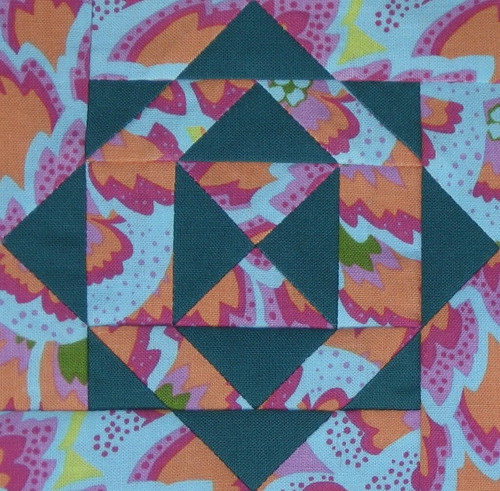
Dear Jane® book reference: Block A-2, page 17
My comments: This block puzzled me a bit when I first looked at it. The diagram in the book was clearly not the same as Jane's original piecing. Which should I follow? ... well, I think we're pretty clear that I am not planning to be a purist and follow this pattern to the T. So I came up with a 3rd option, making the machine piecing simpler and subtracting quite a few seams. If for no other reason than to make quilting easier, regardless of whether it will be hand or machine quilted.
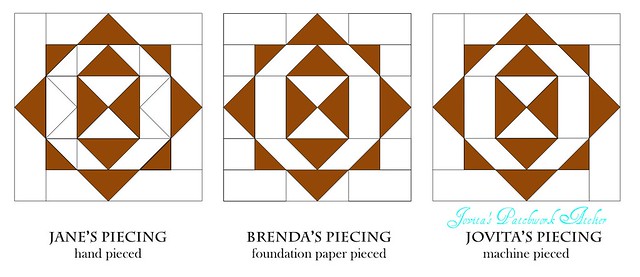
By the way, you can reduce all those seams when hand piecing too. When drafting your templates it might be easier to look at my diagram.
Rotary cutting instructions for use with machine piecing - all seam allowances are 1/4"
I used a lot of what I call the Quick 45˚ Method for this so my cutting instructions may seem strange at first. With the exception of A and F, you will only need to cut squares and rectangles .. all those strange pieces? ... see the steps below to see how those were created.
Background (my print):
Print (my solid teal):
 On the wrong side of one D-I-E unit, mark 3" from the D end. Pin this to your inner block unit lining the mark up with the edge of the block. Sew from the D edge to the edge of the goose shape.
Your are now able to sew the complete seams ... for example the next unit would be placed across the top edge and sewn fully edge to edge. After the 4th side is sewn go back and finish sewing the first seam, lining up the edges and overlapping your stitching by about 1/2".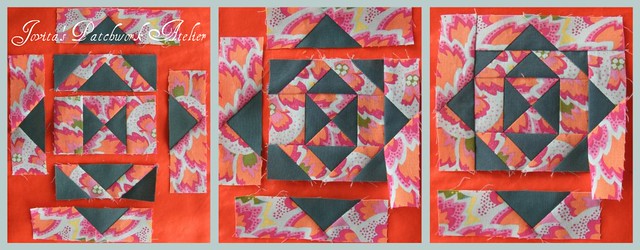
Jovita's Method: machine pieced
My comments: This block puzzled me a bit when I first looked at it. The diagram in the book was clearly not the same as Jane's original piecing. Which should I follow? ... well, I think we're pretty clear that I am not planning to be a purist and follow this pattern to the T. So I came up with a 3rd option, making the machine piecing simpler and subtracting quite a few seams. If for no other reason than to make quilting easier, regardless of whether it will be hand or machine quilted.
By the way, you can reduce all those seams when hand piecing too. When drafting your templates it might be easier to look at my diagram.
Rotary cutting instructions for use with machine piecing - all seam allowances are 1/4"
I used a lot of what I call the Quick 45˚ Method for this so my cutting instructions may seem strange at first. With the exception of A and F, you will only need to cut squares and rectangles .. all those strange pieces? ... see the steps below to see how those were created.
Background (my print):

- One 2-3/4" square (A) ... cut these twice in half diagonally, you will only use two of these new triangles.
- Ten 1-1/4" x 2" rectangles (two B, four C and four D)
- Four 1-1/4" x 2-3/4" rectangles (E)
Print (my solid teal):
- One 2-3/4" square (F) ... cut these twice in half diagonally, you will only use two of these new triangles.
- Six 1-1/4" x 2" rectangles (two G and four I)
- Four 1-1/4" squares (H)
So, here's how I went about piecing this block.
- Piece a traditional hourglass shape with pieces A and F. The triangles were cut a little large to give you room to trim this unit to 2" square.
- Add Bs to each side of this unit and press the seams toward B for minimal bulk.
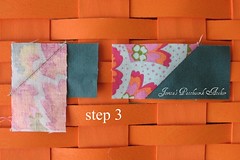
- For the "flying geese" shapes place a C right sides together on top of G lining up the top and left edges. Carefully draw a line from the bottom left of G to the top right of C. Sew along this line and then press backwards to check that the shape is straight. (I trimmed these seam allowances to 3/16" ... yes, do this! trim these, some people don't but trust me with a block this size you will not want to. Regardless, I always trim them.) Make two of these using C and G, and four using D and I.
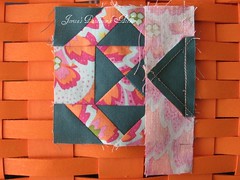
- Now place another C on top of your C-G unit, this time lining up the top and right edges. Repeat the same process .. you should now have completed two C-G-C units. Use this same technique to make four D-I-E units, see a quick photo here.
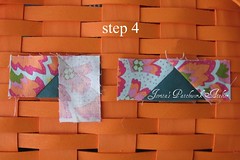
- Add a H to each end of both C-G-C units. Again: draw, sew, press and trim.
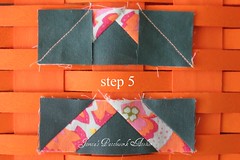
On the wrong side of one D-I-E unit, mark 3" from the D end. Pin this to your inner block unit lining the mark up with the edge of the block. Sew from the D edge to the edge of the goose shape. Your are now able to sew the complete seams ... for example the next unit would be placed across the top edge and sewn fully edge to edge. After the 4th side is sewn go back and finish sewing the first seam, lining up the edges and overlapping your stitching by about 1/2".
- Minka re-drafted this block too! Check out what she did here, it's adorable!!
- Anina, from That Quilt shows you how to foundation paper piece this block here.
6 comments:
Very accurate piecing, much more than mine, this block is wonderful.
lovely!
wow, J: precision! I did mine by hand and didn't get all those corners matched up so beautifully! My biggest problem so far is that my heavily pieced blocks are coming out smaller. I believe they should be 5 inch square right now? and mine are closer to 4 1/2... :(
I am so happy you pointed out the superfluous seams: I followed my instinct as well when drafting my templates and it really helped, and I have also been doing the same for anything that looks 'flying-geesy': Oh this is such fun! Can't wait to see which one you choose next!
....and not to be picky, but I think this is A2.
:)
I think I'll do this one later. When my head is clear. But I'll use your directions for sure.
Yowsers!!! My hat is off to you lady!!
Thank you for changing the comment setting Jovita!! I love this block and I love the step by step.
Post a Comment